Chapter 13
Managing due dates and validity periods
Record dates such as effective dates, promulgation, submission, filing, application, start, end, renewal and deadlines for each document (or for the whole repository). Recorded due dates are shared with everyone who uses the repository. They are recorded without saving a version.
The due dates screen
Open the due dates screen with Due dates at the top right of the repository home, or with Due dates in the right pane.
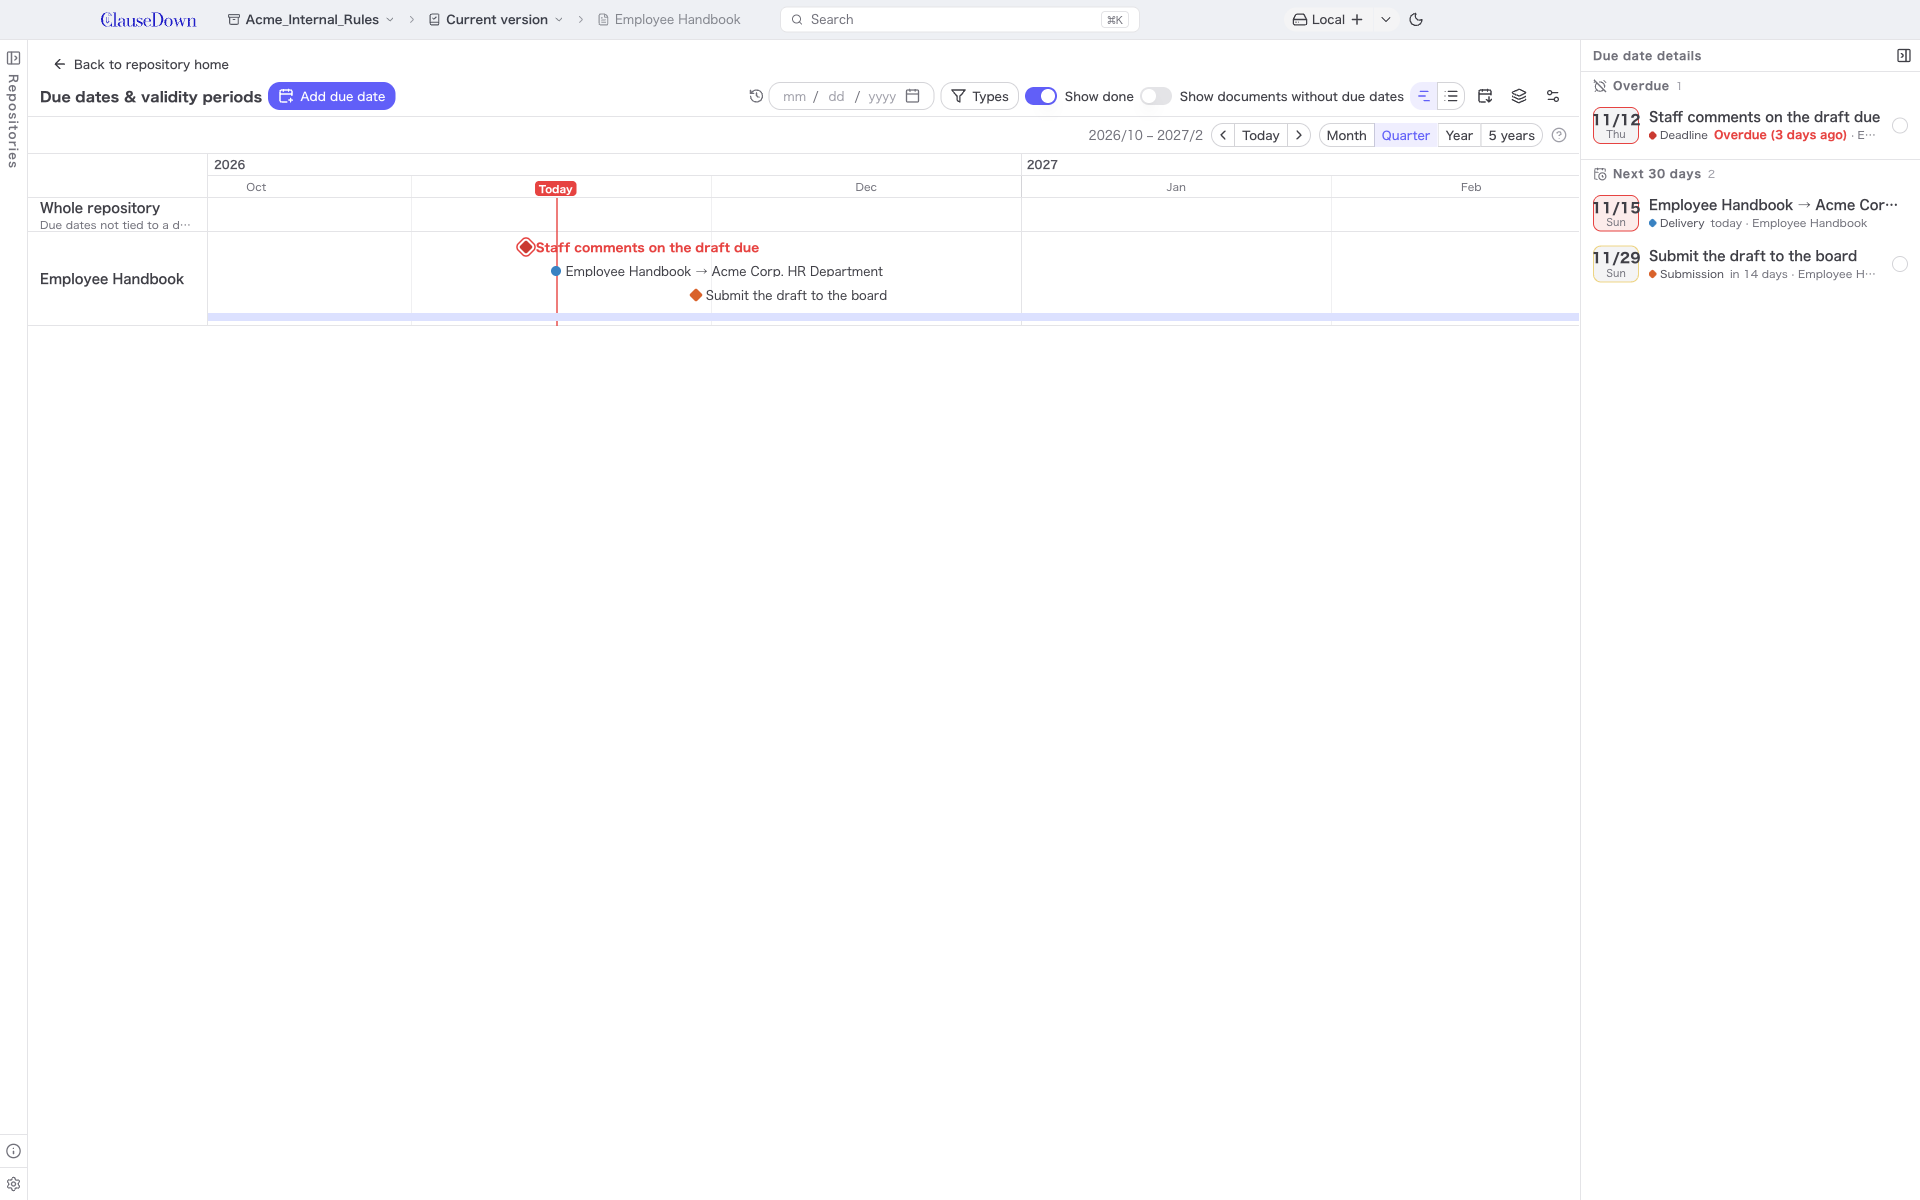
- It is a timeline with documents arranged vertically and dates horizontally. The top row, Whole repository, is for due dates not tied to a document.
- A single-day due date is shown as ◆, and a period (a due date with a start and end date) as a band. The color depends on the due date type.
- The red vertical line is today. Due dates that have passed and are not marked as done are outlined in red.
- Due date details on the right shows overdue items, items in the next 30 days and items recently marked as done.
Timeline controls:
| Action | Result |
|---|---|
| Click Month, Quarter, Year or 5 years | Change the scale |
| Ctrl+wheel | Zoom in or out |
| Drag the background, or Shift+wheel | Move to earlier or later dates |
| Click Today | Center on today again |
| Double-click an empty area | Add a due date on that date |
| Click the scale at the top | Set that day as the selected date |
| Click a validity period band | Select that effective version |
| Drag a due date | Move its date (repeating due dates, effective versions and delivery records cannot be moved) |
| Click a due date | Show its details on the right |
Click a due date to see its details on the right, with Mark as done, Edit and Delete buttons. The image below shows a due date for submitting a draft to the board of directors selected.
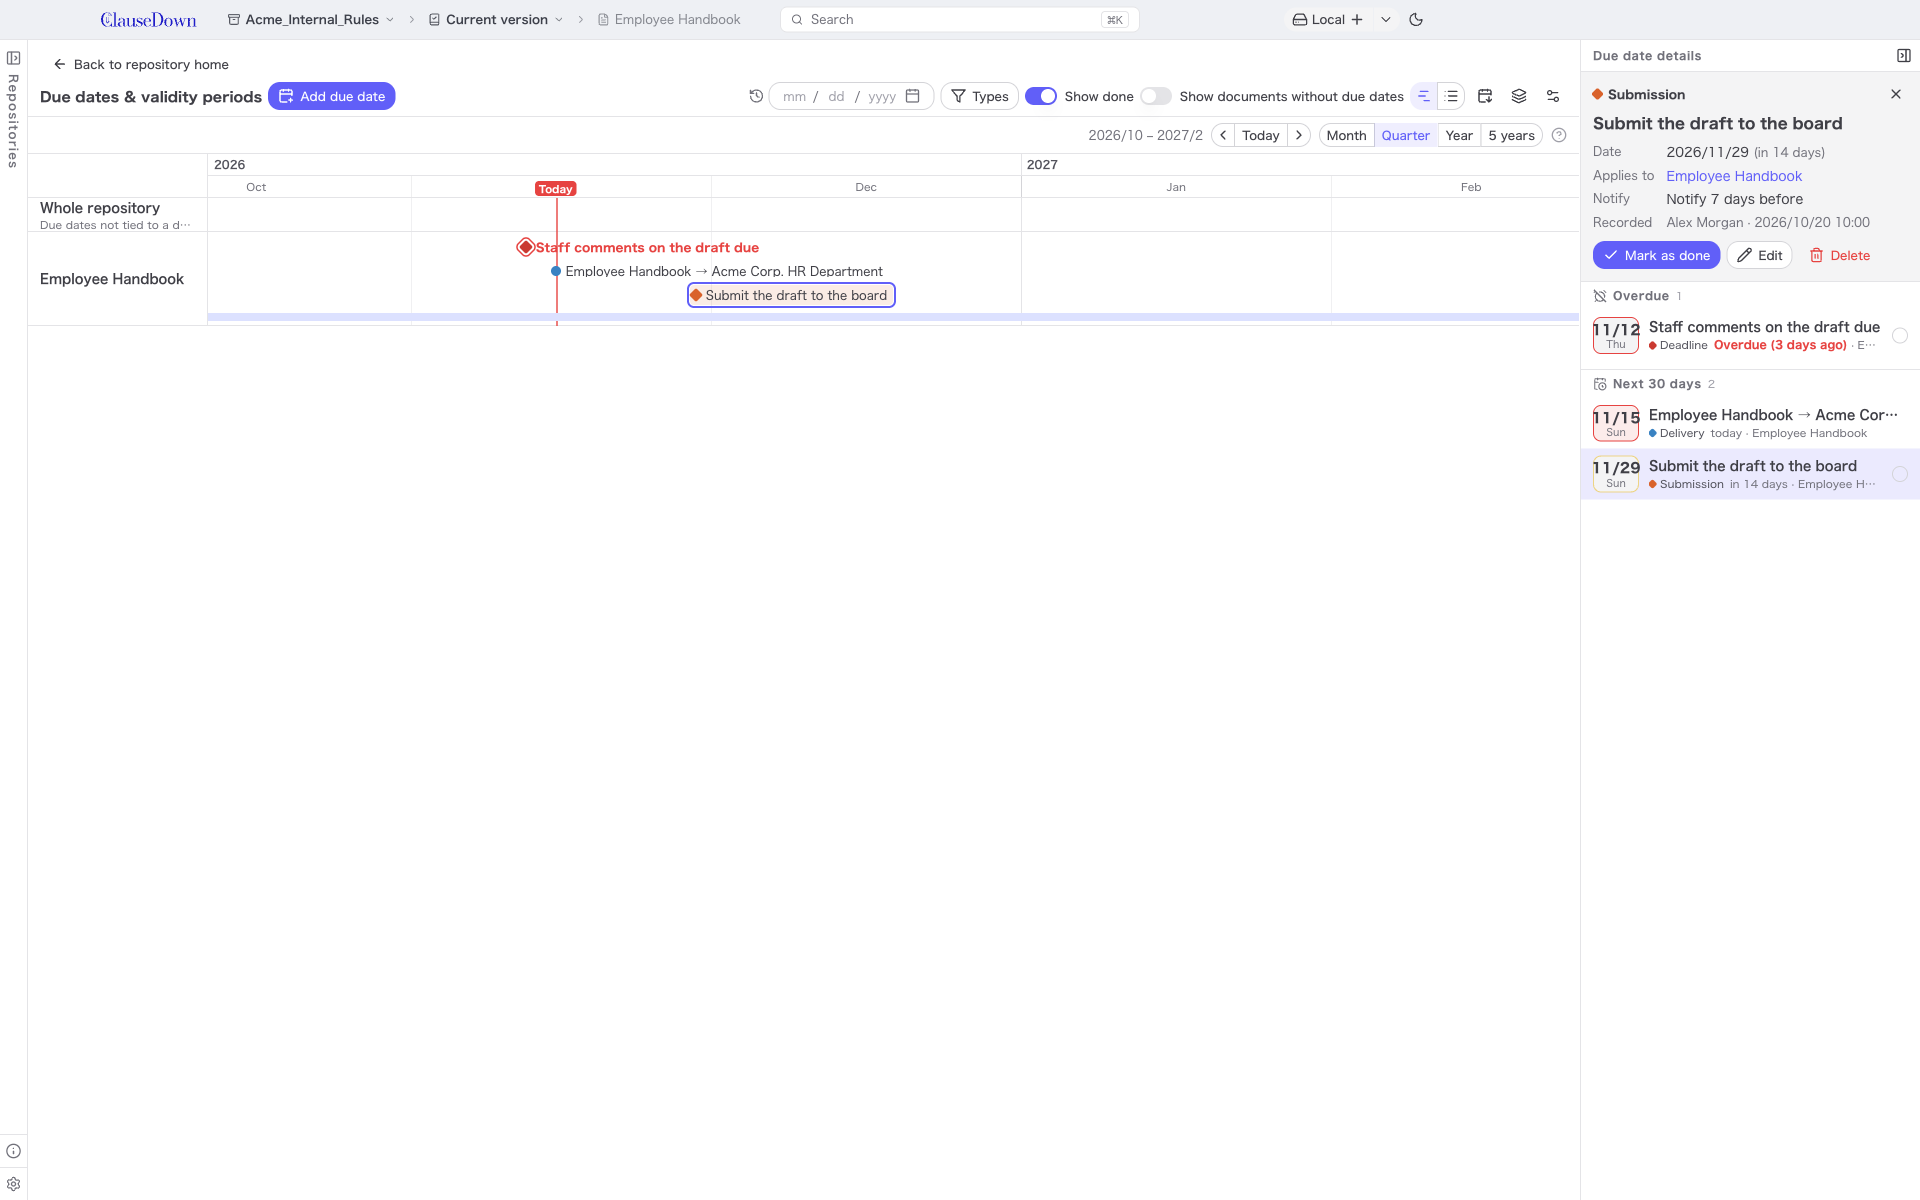
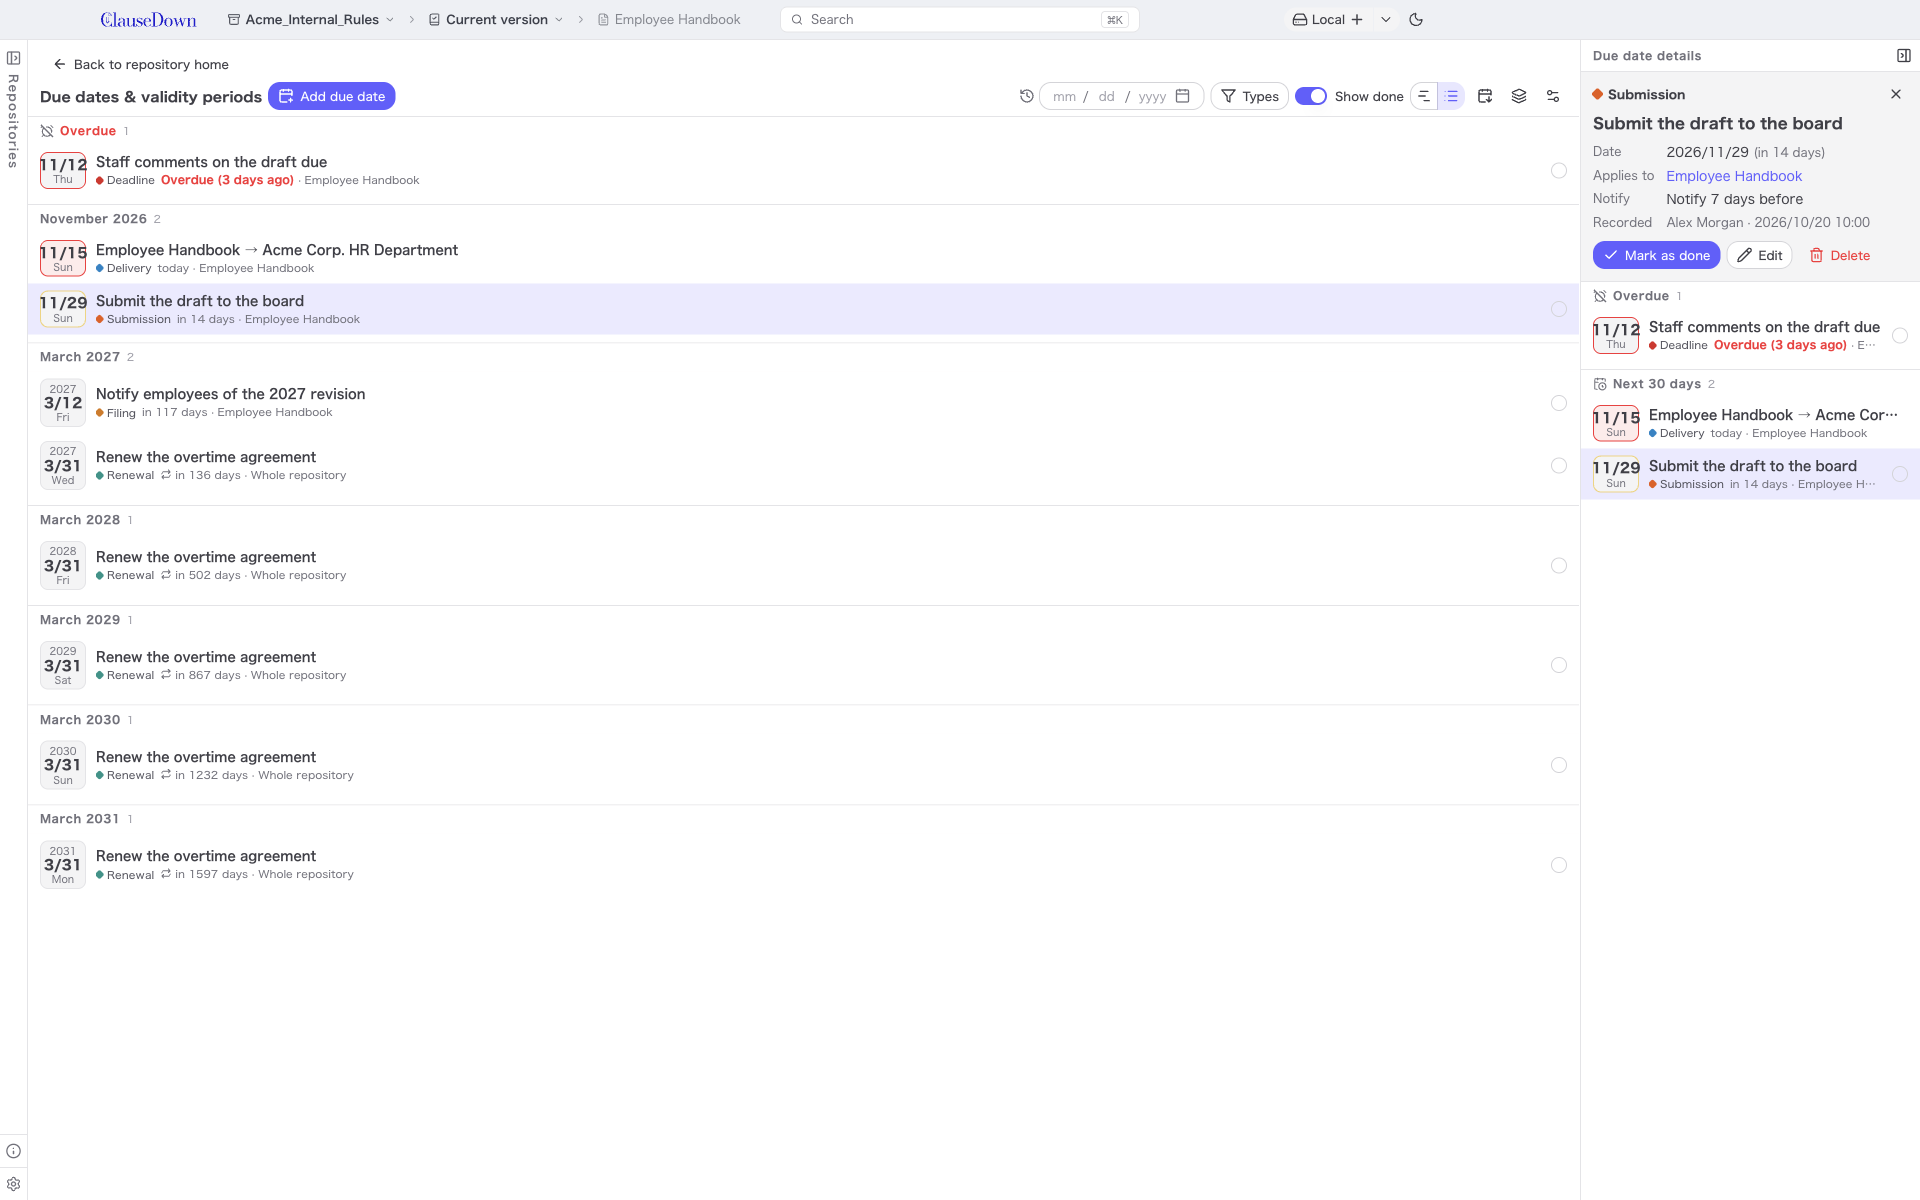
Use Type on the toolbar to filter by type, and Show done to show or hide due dates marked as done. Use the button on the right to switch between the timeline and the list.
Validity periods and versions on a given date
A version with an effective date is in force from that date until the day before the next version's effective date. This period is called the validity period and is shown as a band below the document's row on the timeline. The band for the last effective version extends to the right with no end.
Enter a date in the date field on the toolbar, or click the scale at the top, to see which versions were in force on that date.
- A blue dotted line is drawn on the timeline, and the bands that include that date are shown darker.
- The top of the right pane shows "Versions on (date)". For each document, it lists the validity period of the effective version in force on that date. Documents that first took effect after that date show Not yet effective.
- Click a document to open its Due dates & delivery tab with that effective version selected and its text shown.
- Click × in the date field to clear the date.
Click a validity period band to select that effective version's effective date and show the validity period in the details on the right. Click Open due dates, validity & delivery to open the tab with that effective version selected.
Effective dates set on Whole repository (not tied to a document) are shown as bands in the Whole repository row and are not included in each document's validity periods.
Adding a due date
Click Add due date.
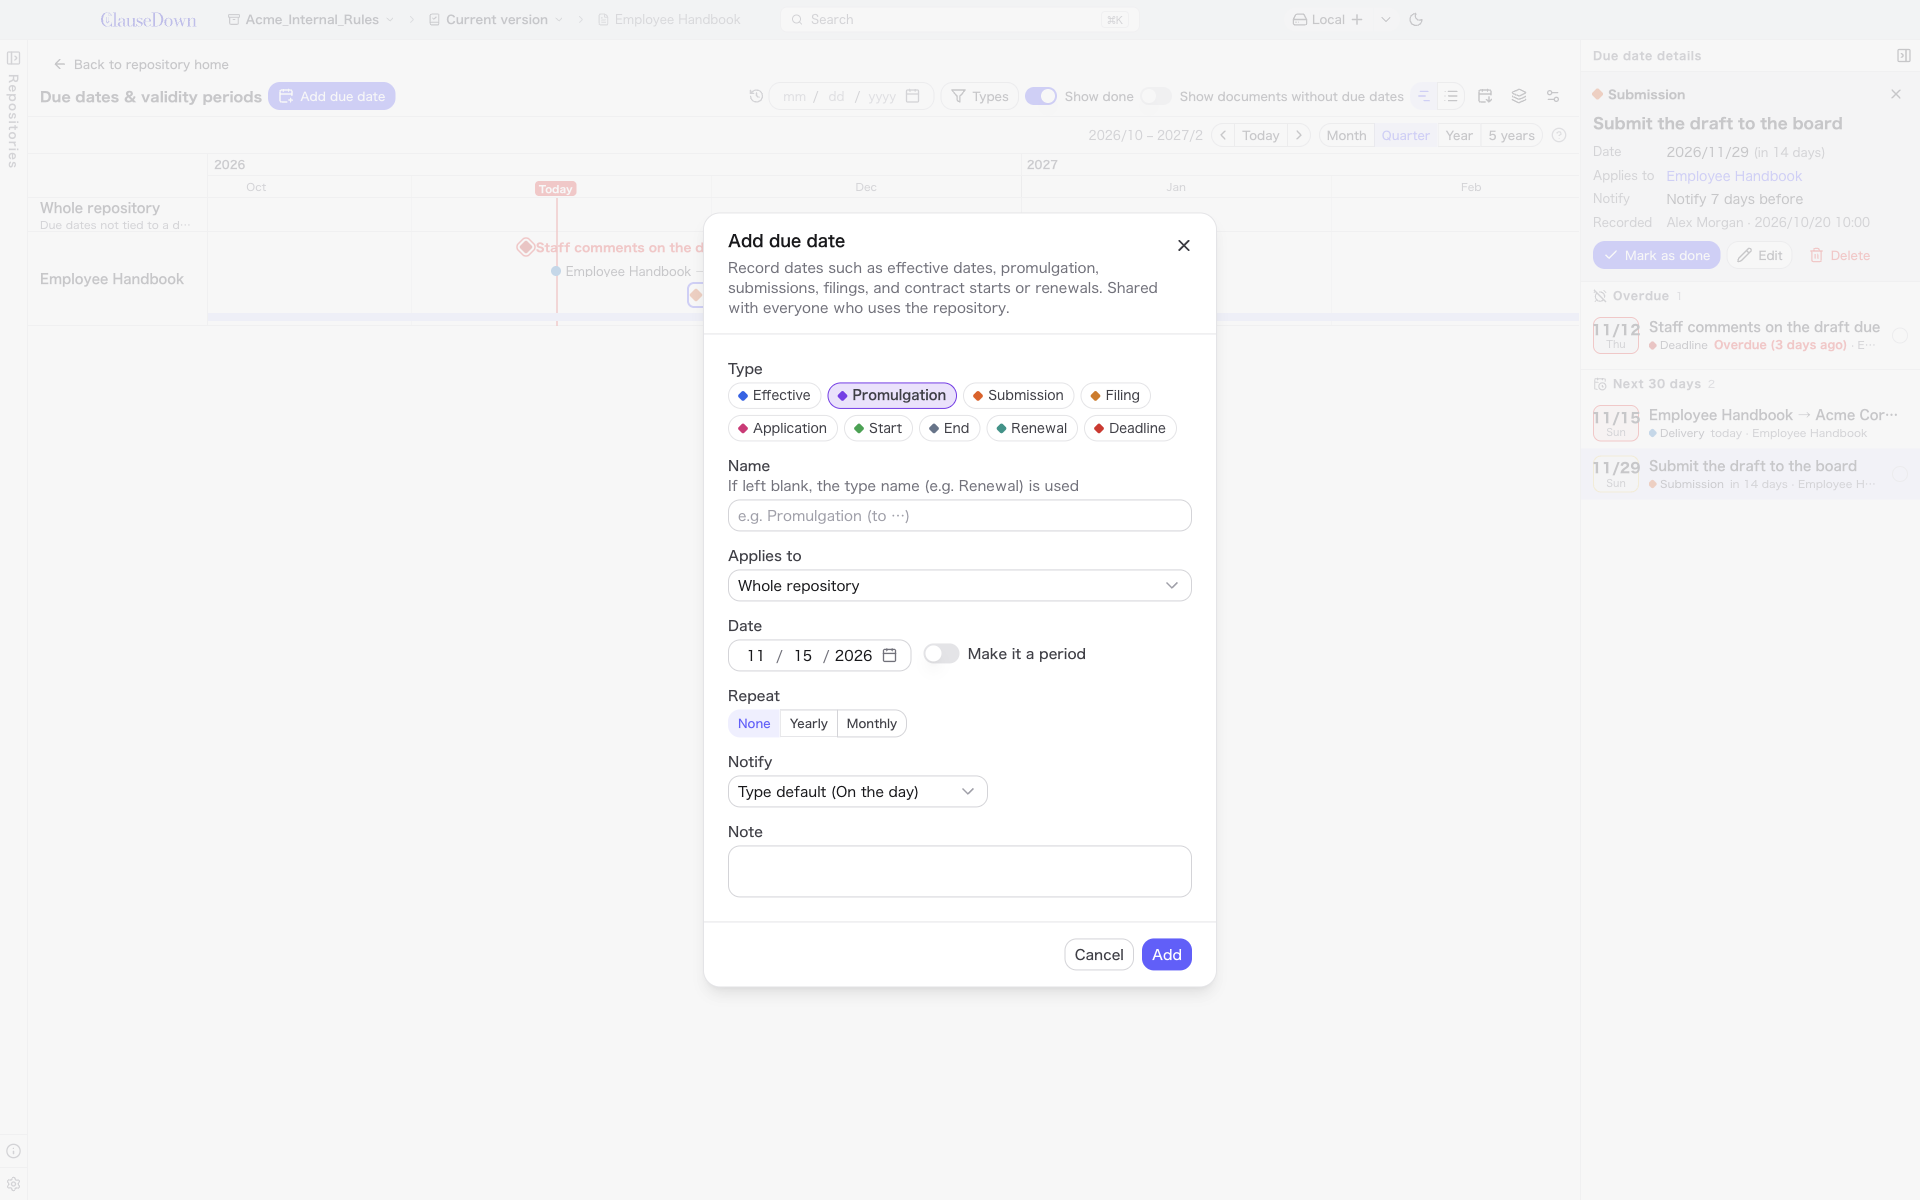
- Choose a Type.
- Enter a Name. If you leave it blank, the type name (for example "Renewal") is used.
- Under Applies to, choose a document. Whole repository means the due date is not tied to a document.
- Enter the Date. Type numbers into the year, month and day fields, or click the calendar button to pick a date. Dates that do not exist (such as February 30) cannot be entered. Turn on Make it a period to also enter an end date.
- Under Repeat, choose Yearly or Monthly to repeat on the same date. You can also set when it ends. If a month has no such date (for example the 31st), the last day of the month is used.
- Under Notify, choose how many days in advance to be notified. Choose the type default to use the number of days set for the type.
- Click Add.
Done and overdue
Among the default types, Submission, Filing, Application, Renewal and Deadline are types you mark as done. They stay in the list until you mark them as done, and once the date has passed they show as Overdue. Effective, Promulgation, Start and End are treated as complete once the date arrives, so no Mark as done action is shown for them. You can change which types are marked as done in the due date type settings.
Repeating due dates are marked as done one occurrence at a time. Occurrences older than 90 days (monthly) or 400 days (yearly) do not count as overdue even if they are not marked as done.
Changing due date types
Change each type's name, color, whether it can be marked as done, and how many days in advance to notify by default under Due date types in the repository settings. You can also open it with the button at the right end of the due dates screen's toolbar. Types are set per repository and shared with everyone who uses it.
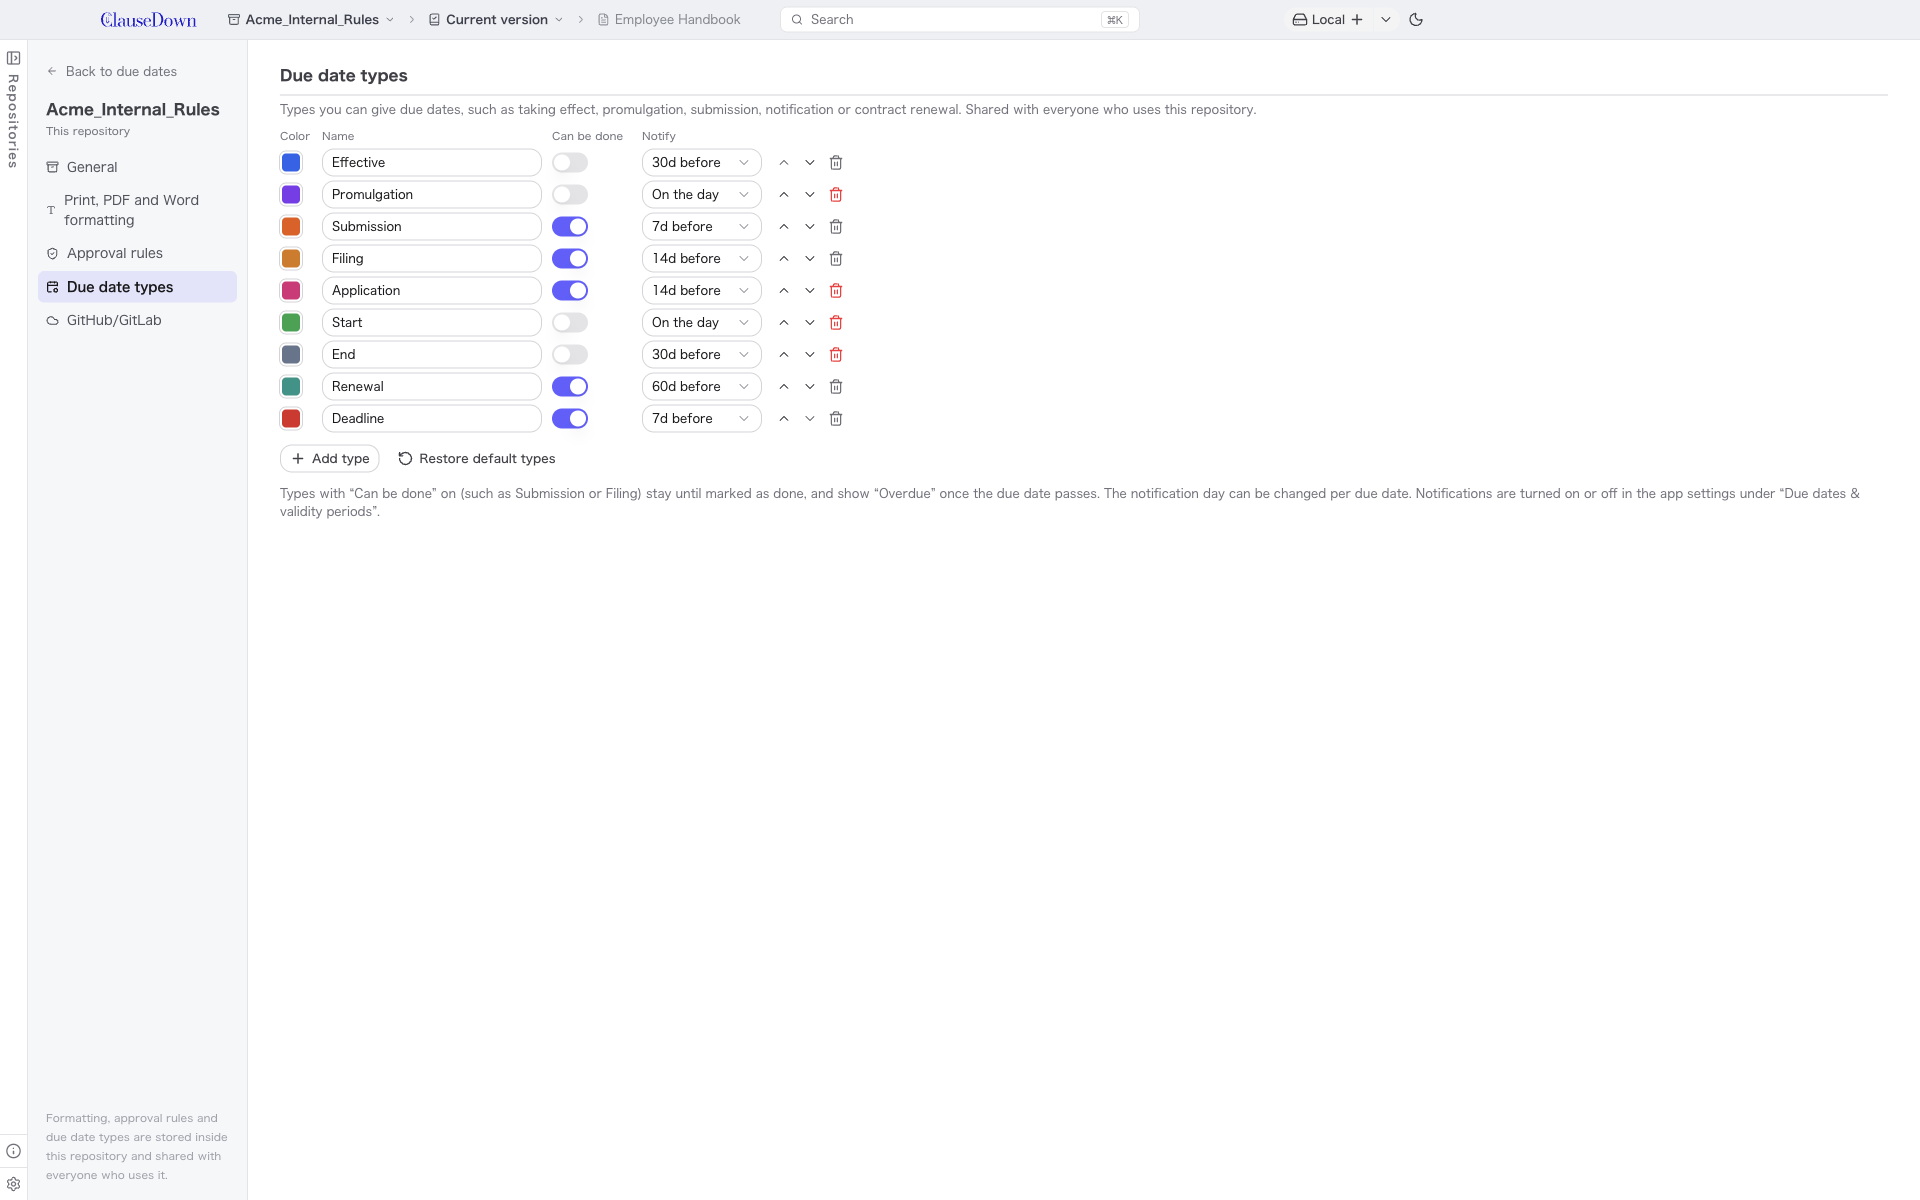
Use Add type to add your own types (for example, inspections or shareholders' meetings). Types that are in use by a due date cannot be deleted.
Desktop notifications
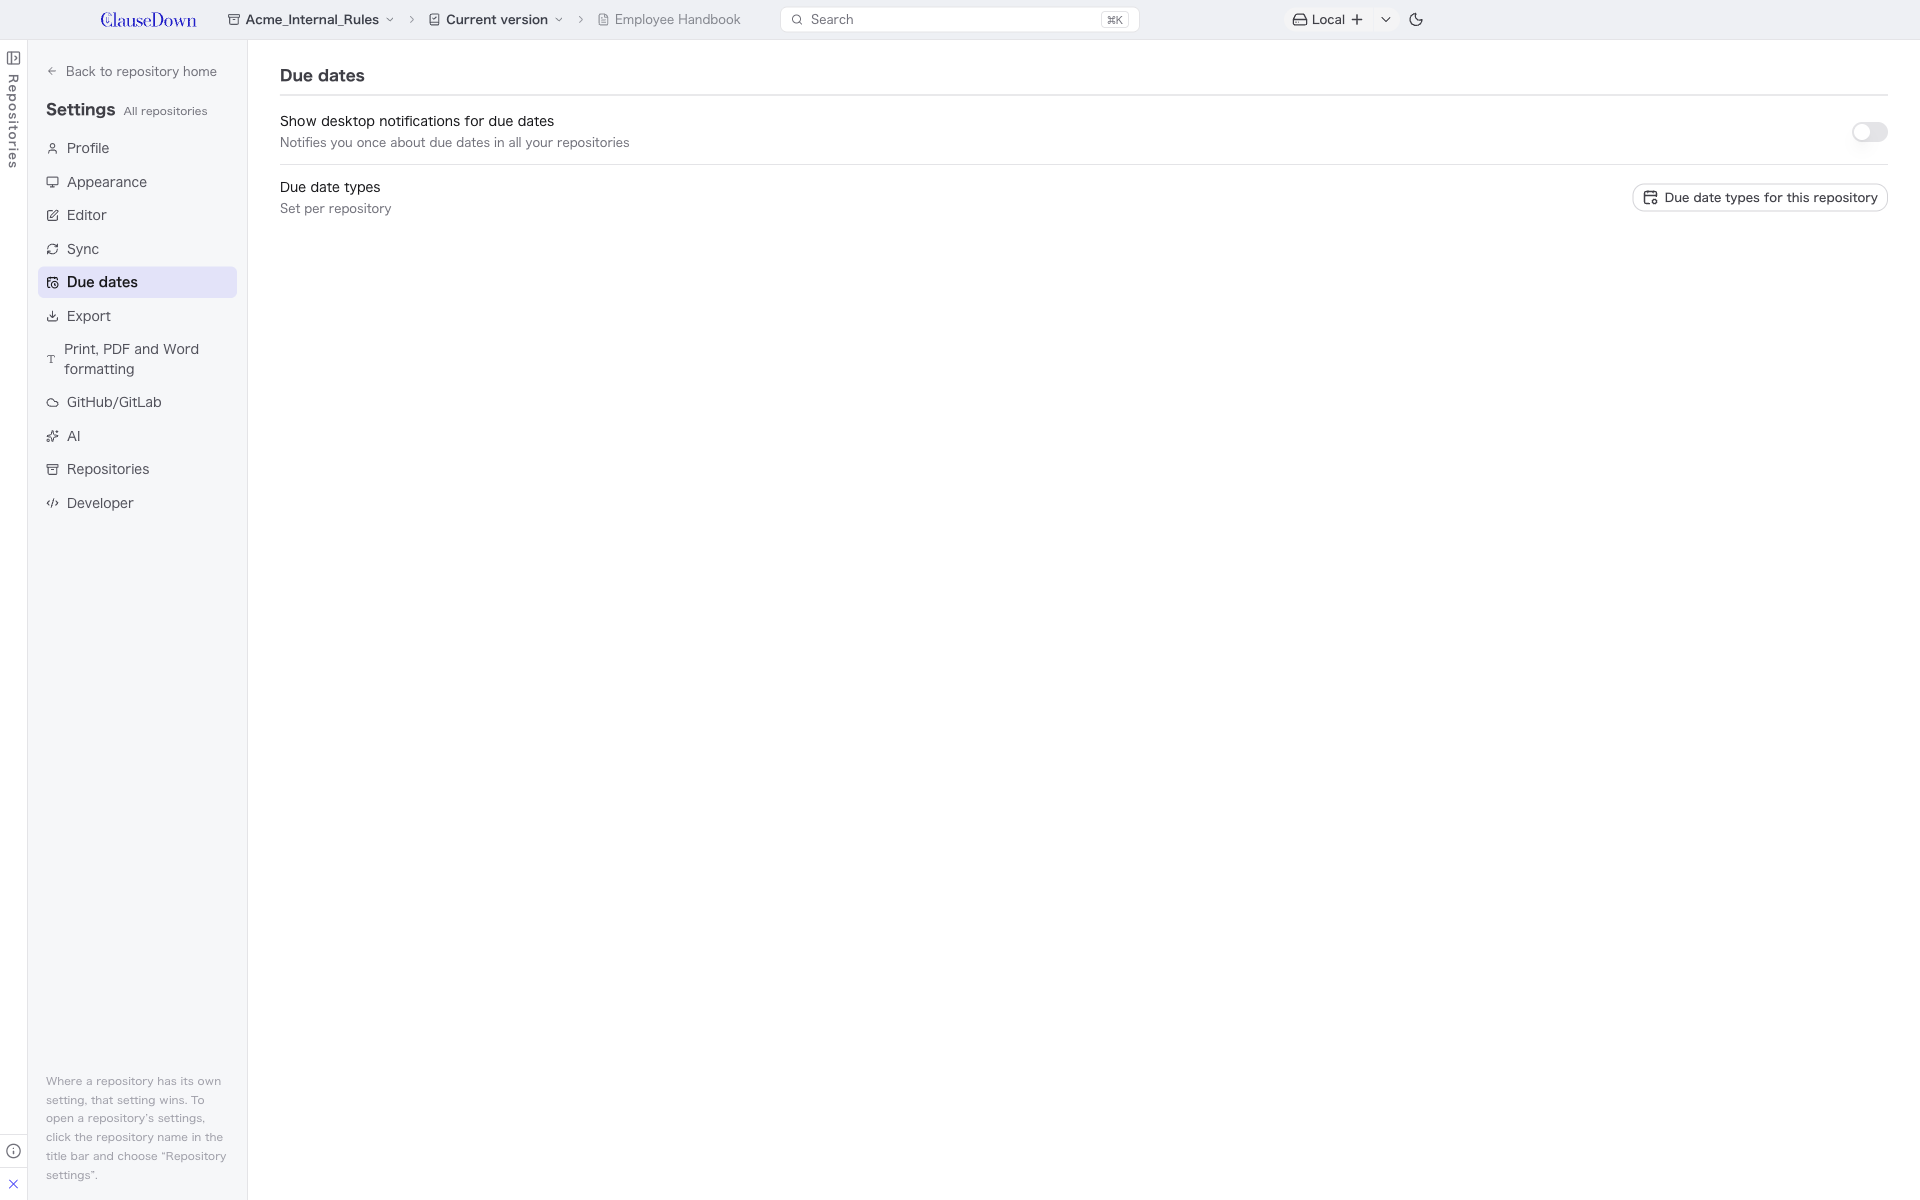
Turn on Show desktop notifications for due dates under Due dates in Settings. While the app is running, it checks due dates every hour and notifies you through the OS of due dates whose notification day has arrived and of overdue ones. Each due date is notified only once. No notifications are shown while the app is closed.
Exporting to a calendar app
Click the button with a calendar and a down arrow on the due dates screen's toolbar (Export to calendar) to export due dates to an iCalendar (.ics) file. You can import it into calendar apps that support iCalendar, such as Outlook and Google Calendar.
- Due dates not marked as done and effective dates from one year ago to five years ahead are exported.
- Each occurrence of a repeating due date becomes one event.
- An alarm is set for 9:00 on the notification day.
- The exported file is a snapshot of the due dates at that time. Changes you make later in the app are not reflected in the calendar; export and import again. Whether reimporting replaces the earlier events or adds duplicates depends on the calendar app.
Clicking the same button in Due dates across all repositories on Home exports the due dates of all repositories together.